At the beginning of a project, architects and developers work with site plans, massing models, and early test fits. These outputs help a project team assess what can fit on a site, but clients and investors may need another way to understand the proposed building’s scale, character, and relationship to its surroundings.
Architectural rendering translates a design into a visual representation. During real estate feasibility, AI rendering can turn an early model view into an image that helps people discuss the concept before detailed design is complete.
At Zenerate, we connect this visualization step with the modeling work already happening in the app. The useful result is a presentation that makes the proposal easier to understand while keeping the design assumptions visible.
What Is Architectural Rendering?
Architectural rendering is the creation of images that communicate a proposed building or space, including its form, materials, lighting, and context. Renderings can range from loose concept illustrations to detailed images, and may form part of animations or interactive presentations. The appropriate level of detail depends on what the audience needs to understand.
A test fit and a rendering serve different purposes in an early feasibility study. The test fit explores the proposed program within the site inputs and constraints. The rendering helps explain what that arrangement could look and feel like. Unit counts, floor area, parking quantities, and financial assumptions should remain tied to the underlying study.
In a model-based rendering workflow, an image is produced from scene geometry, materials, and lighting. Generative AI rendering can interpret a reference image and a prompt to create visual detail. That interpretation is useful for exploring character, but it can also introduce details that were never defined in the model.
Using AI Rendering Inside Zenerate
Start with a building or solution created in Zenerate. Choose a view that makes the design question clear: an elevated view for the overall massing, for example, or a view that emphasizes the building’s relationship to the street.
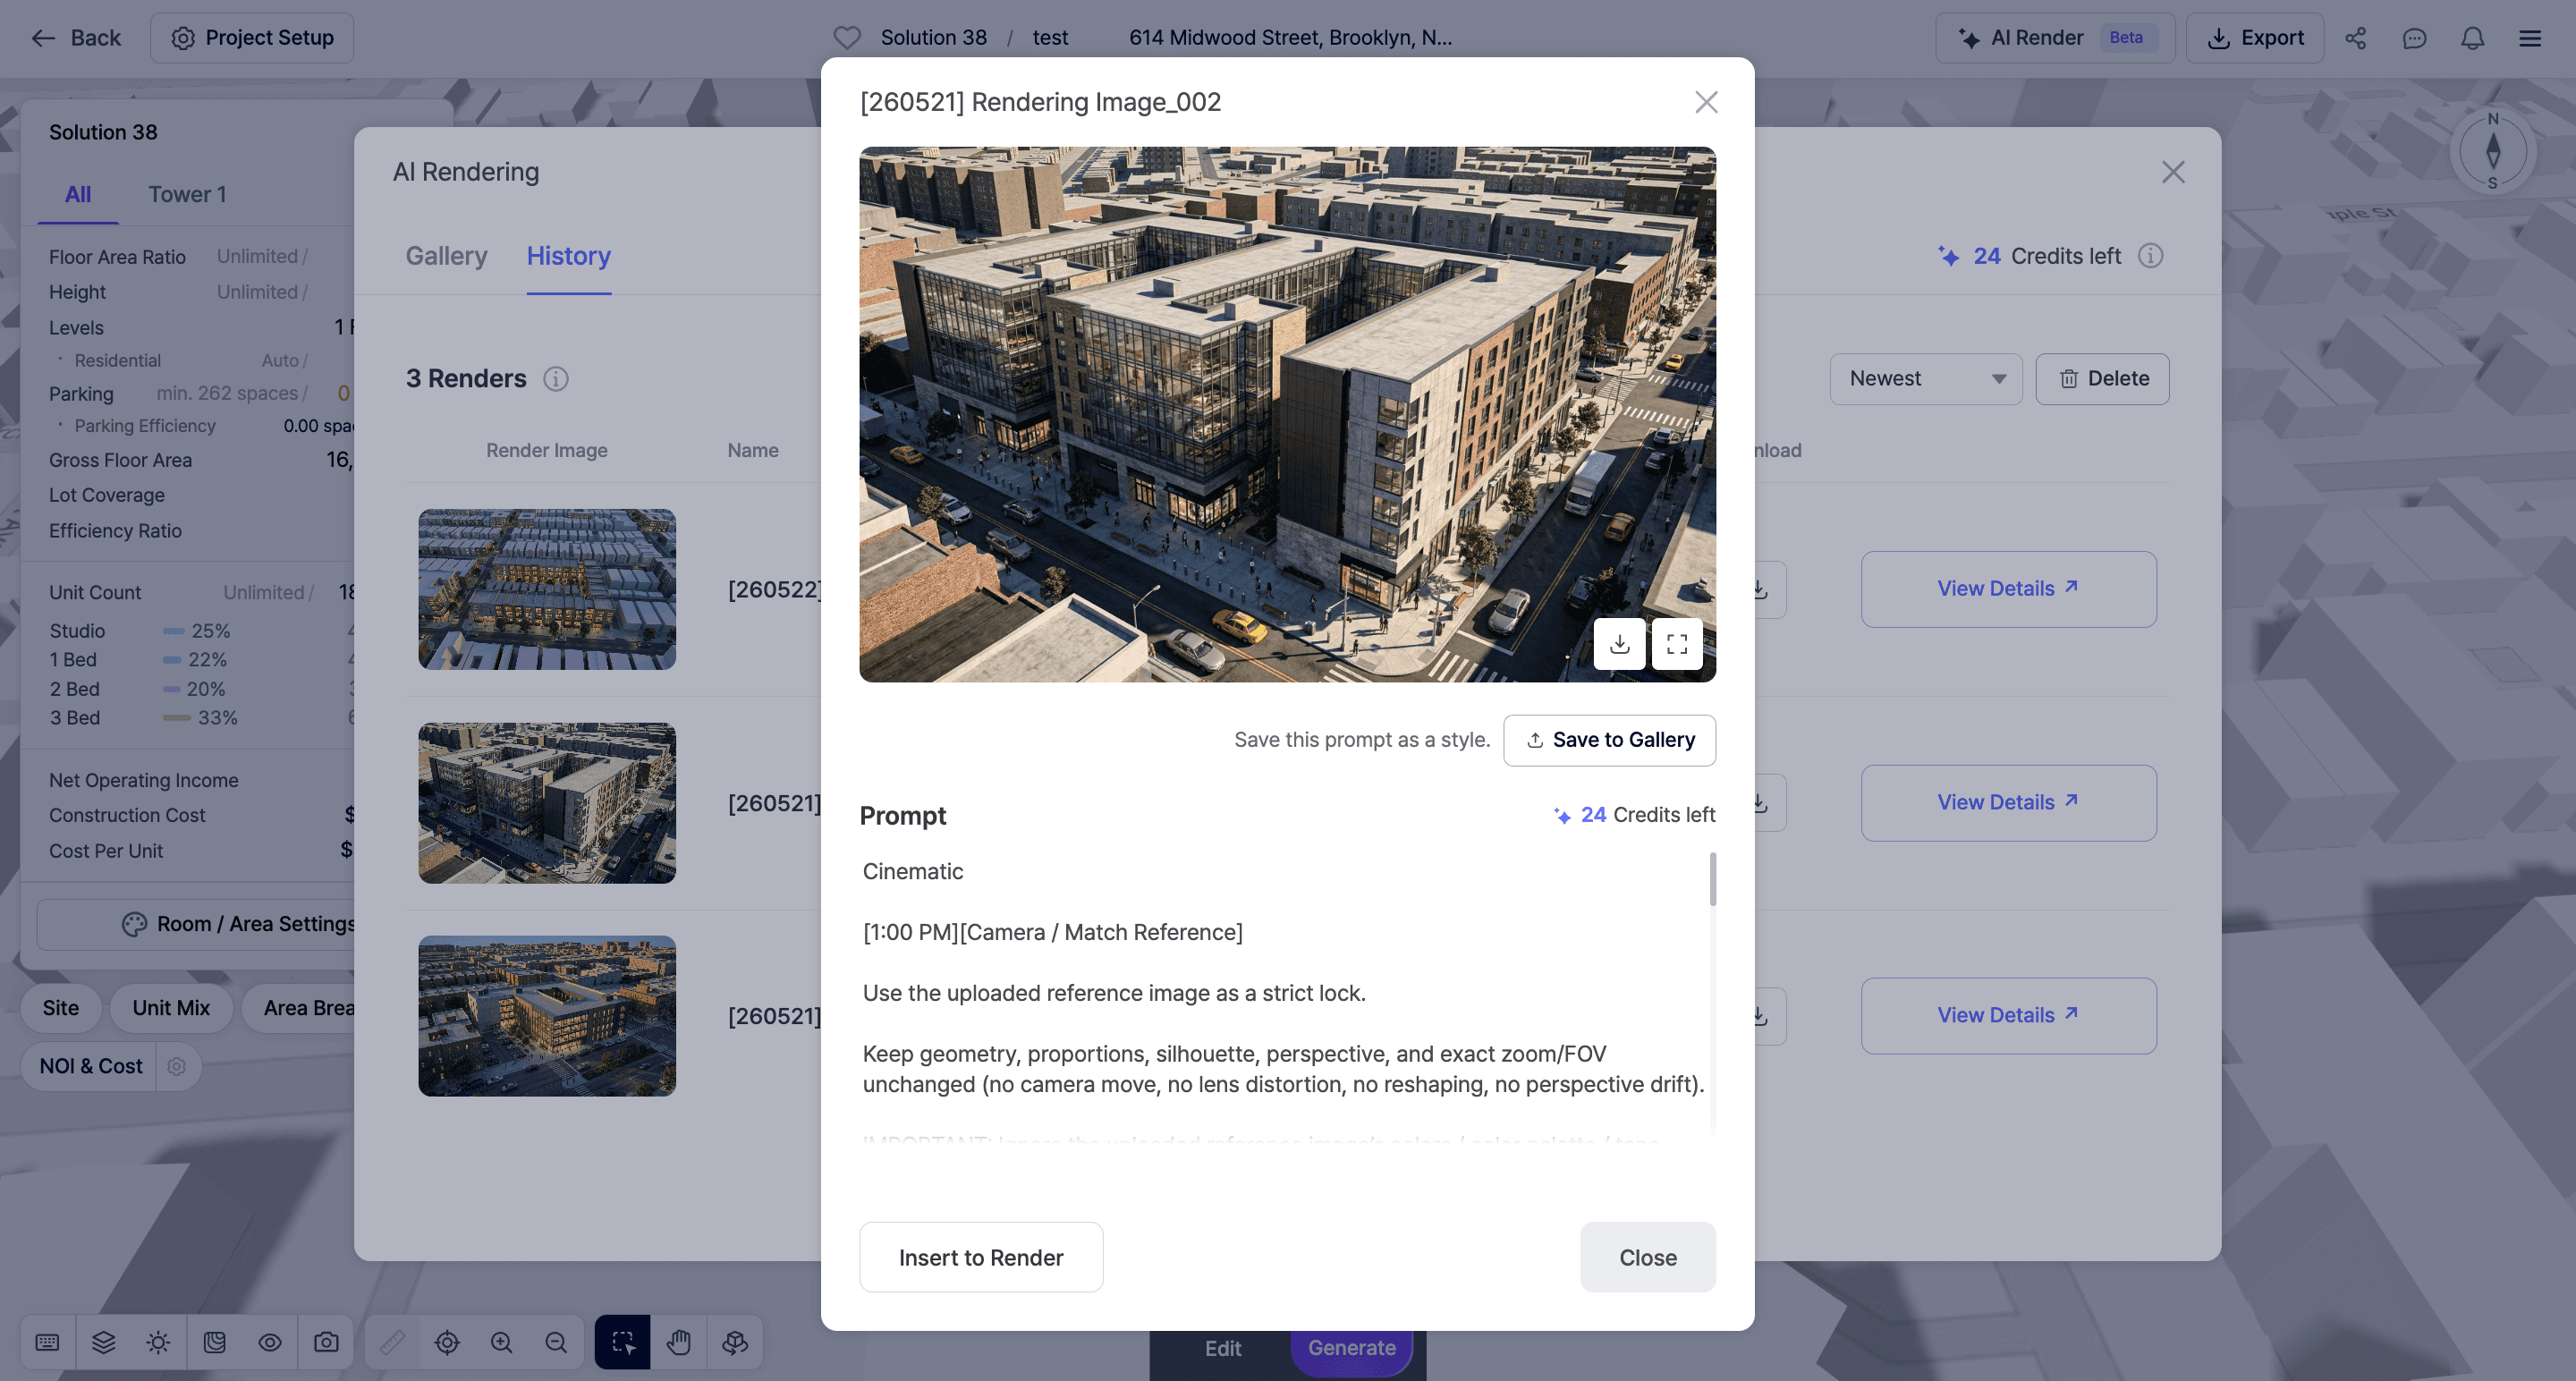
Open the AI Rendering panel, select a preset style from the Gallery or enter a custom prompt, and confirm the source view. The workflow supports selecting a 2D or 3D image. You can track progress in the Render Queue, review completed images in Render History, and download the result. Useful prompts can be saved to the Gallery.
Our AI Rendering tutorial covers the interface step by step. For feasibility presentations, the additional task is to review the image against the source option before sharing it.
How to Prompt AI Rendering Without Losing Design Intent
A useful prompt separates the elements that should stay fixed from the appearance you want to explore. Identify the building footprint, massing, visible floor levels, courtyard, access points, and camera view as constraints. Then describe the material palette and atmosphere.
For example: “Use the reference view as the basis for the image. Keep the building footprint, massing, visible floor levels, courtyard opening, entrances, parking layout, and camera angle unchanged. Explore warm brick and clear glazing in neutral daylight. Do not add floors, balconies, buildings, or site features.”
This is an instruction to guide the output, not a guarantee of geometric accuracy. Compare the result with the source view. If the image changes something material to the concept, revise or reject it before using it to explain that option.
Avoid asking the image to resolve an unanswered feasibility question. If the brief changes to include a larger courtyard or a different parking arrangement, update the study and generate a new reference view first. A visual change in the render does not update the model’s quantities.
From Test Fit to Client Visual: An Annotated Example
Consider an illustrative review of a courtyard building. The client wants to discuss façade character and how the building meets the street. The team prepares the current test-fit view, an AI render, and a short explanation of which details are established and which are exploratory.
Source study: Use the current model to establish the footprint, courtyard, height, access, and parking arrangement. Identify the option and revision date. Keep its area and unit schedules available beside the image.
Rendering brief: Ask for a material and lighting direction while preserving the visible configuration. This keeps the presentation focused on character rather than silently proposing a different scheme.
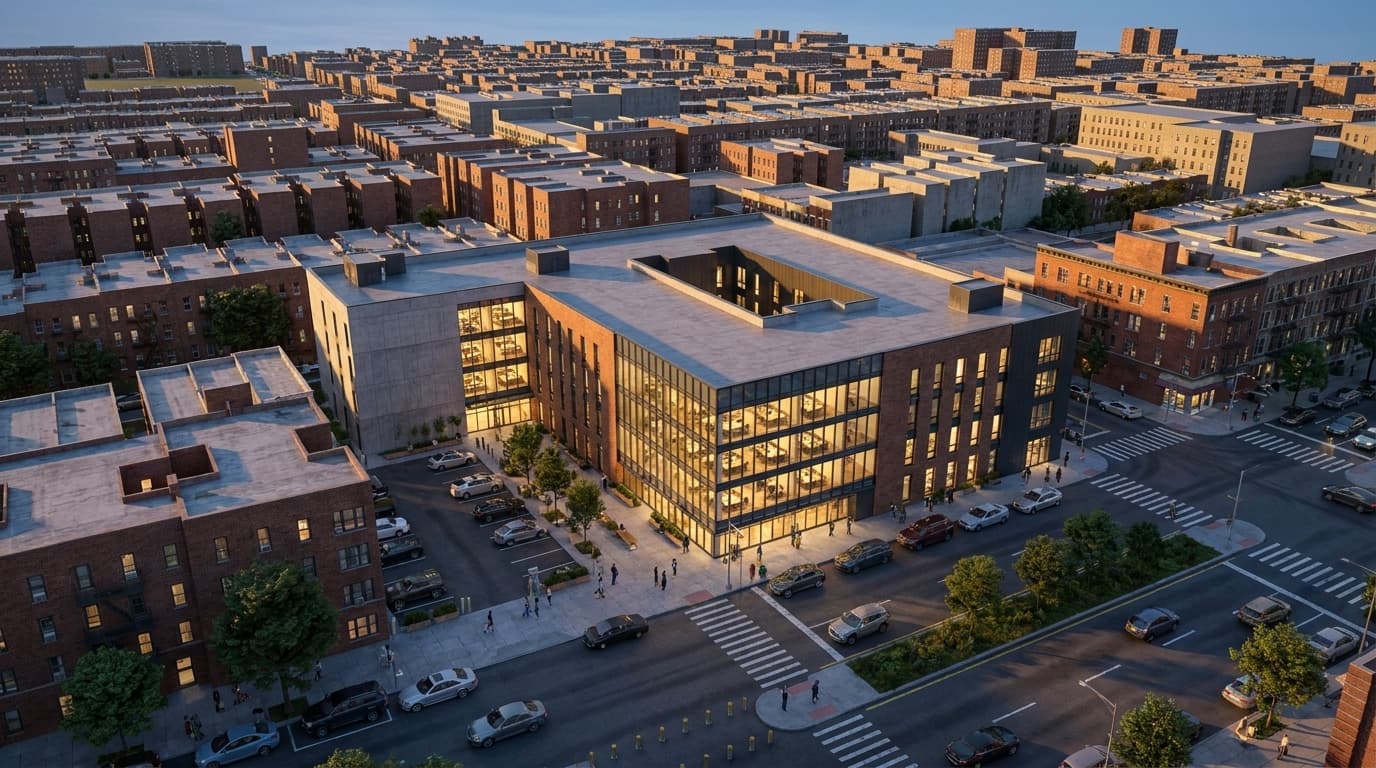
Annotation A — massing and courtyard: The image shows a central opening and several connected building volumes. Compare their shape, rooflines, and proportions with the selected test fit. Count visible levels against the model rather than assuming the façade image is exact.
Annotation B — façade and lighting: Brick, glazing, and illuminated interiors communicate an architectural direction. Unless these elements are developed in the design, describe them as illustrative. Their appearance does not establish material specifications or verified daylight performance.
Annotation C — street and parking: Vehicles, sidewalks, crossings, and planting make the scene easier to interpret. Check them against the actual site information. Do not infer parking capacity, access compliance, or public-realm commitments from generated surroundings.
A presentation caption could read: “Concept visualization of the selected test-fit option. Materials, lighting, and landscape treatment are illustrative. Refer to the accompanying model and schedules for project quantities.” Use that caption only after reviewing the image’s consistency with the selected option.
How Architectural Rendering Supports Client Presentations
For a developer-client meeting, an image can make the conversation more specific. Instead of asking whether the client likes a massing diagram, the team can discuss the courtyard’s character, the relationship to the sidewalk, or the intended appearance of a frontage. Record whether the feedback concerns visual treatment or requires a change to the underlying design.
For investor and acquisition discussions, pair the image with the relevant project information. A visual can explain the concept behind a unit mix or development approach; the financial feasibility analysis explains its costs, assumptions, and projected performance. An attractive rendering is not evidence that those projections will be achieved.
For early planning or community conversations, renderings can help explain scale and context. Show the source plan and identify unresolved details so the audience understands the proposal’s stage. The image supports discussion; it does not establish approval.
Later, reviewed renderings may support marketing or leasing materials. Early feasibility images should be revisited before that use, particularly if the program, amenities, materials, or site layout have changed. Features introduced by AI should not become promises about the finished project.
Comparing Design Options Without Confusing the Decision
When comparing alternatives, keep the camera angle, image treatment, and level of finish consistent where possible. A dramatic sunset in one image and a flat daylight view in another can distract from the actual differences between the designs.
For example, if the question is whether a courtyard arrangement or another building configuration better supports the brief, show the corresponding model views and quantities beside each rendering. If the question is brick versus another façade treatment, use the same underlying option and make clear that only the visual direction is changing.
Keep each downloaded image associated with its source solution and prompt. If feedback leads to a different footprint, height, or unit mix, revise the model and review the resulting quantities before preparing the next visual. Our guide to Generate Here and Create AI Solutions explains how generated alternatives fit into that design workflow.
What AI Rendering Cannot Confirm
An AI-generated image cannot by itself verify zoning compliance, buildable area, structural feasibility, construction cost, or financial viability. It may also interpret incomplete geometry in ways that look plausible while changing the intended design.
Review the visible building form, openings, entrances, access routes, and surrounding context against the model and known site information. Use the model and appropriate professional analysis for measurements and performance. A convincing shadow or illuminated interior is not a substitute for a daylight study.
For this reason, a client-ready rendering needs both visual clarity and clear framing. State that it is a concept, explain the assumptions that remain open, and keep the underlying study available. These habits help a more polished image communicate the project’s actual stage.
Explore AI Rendering With Zenerate
Our Zenerate App helps teams develop early options and communicate them through project information and visuals. If you want to explore AI rendering as part of your feasibility workflow, book a demo and start a free trial. We can walk through how a model becomes a visual your team can review and discuss.
Book a Demo + Start a Free Trial