Designing multi-story buildings often requires varying layouts on different floors. With Zenerate, architects and developers can assign customized typical floor plans in a building. This feature enables better space planning and maximizes efficiency based on design intent, FAR, density, or unit mix.
In this guide, we’ll walk you through how to set up and customize floor plan layouts on each level in Zenerate.
Add New Plan Type
Let’s say you’re working on a 7-story building and want different floor plans grouped like this:
Typical Floor Plan Type A — 2F, 3F,Typical Floor Plan Type B — 4F, 5F
To make sure that each floor can have their own layouts, you must first create the three different plan types by doing so:
1. Click Edit,2. Select your building layout,3. On the right-hand panel, open Typical Floor Plan & Height Setup,4. Turn off the Apply To All toggle,5. Under any floor’s Plan Type dropdown, click Add New,6. Use the Copy of dropdown to select an existing floor (e.g. 2F, 3F) and click Apply to create Plan Type B.

Assign Plan Types
Once you’ve created the necessary floor plan categories, assign them to the correct floors:
1. Go to each floor in the Typical Floor Plan panel,2. Select the corresponding Plan Type,3. Click Apply to update the layout for each selected floor
Your setup should look similar to this:
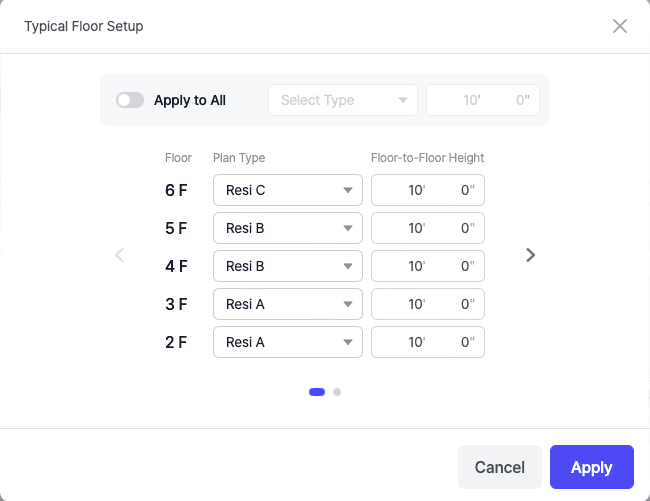
Then hit apply to reflect that onto your building layout.
Floor Type Editing
When editing specific floor layouts:
1. Choose the level you would like to change at the top right corner.
For example, if you want to modify the building layout for Plan B (3F & 5F), make sure to select the floor level that are in said category.

2. Make sure the blue dropdown under the 2D/3D view shows the correct floors assigned to that plan type (e.g., Apply to: 3F, 5F for Plan Type B).
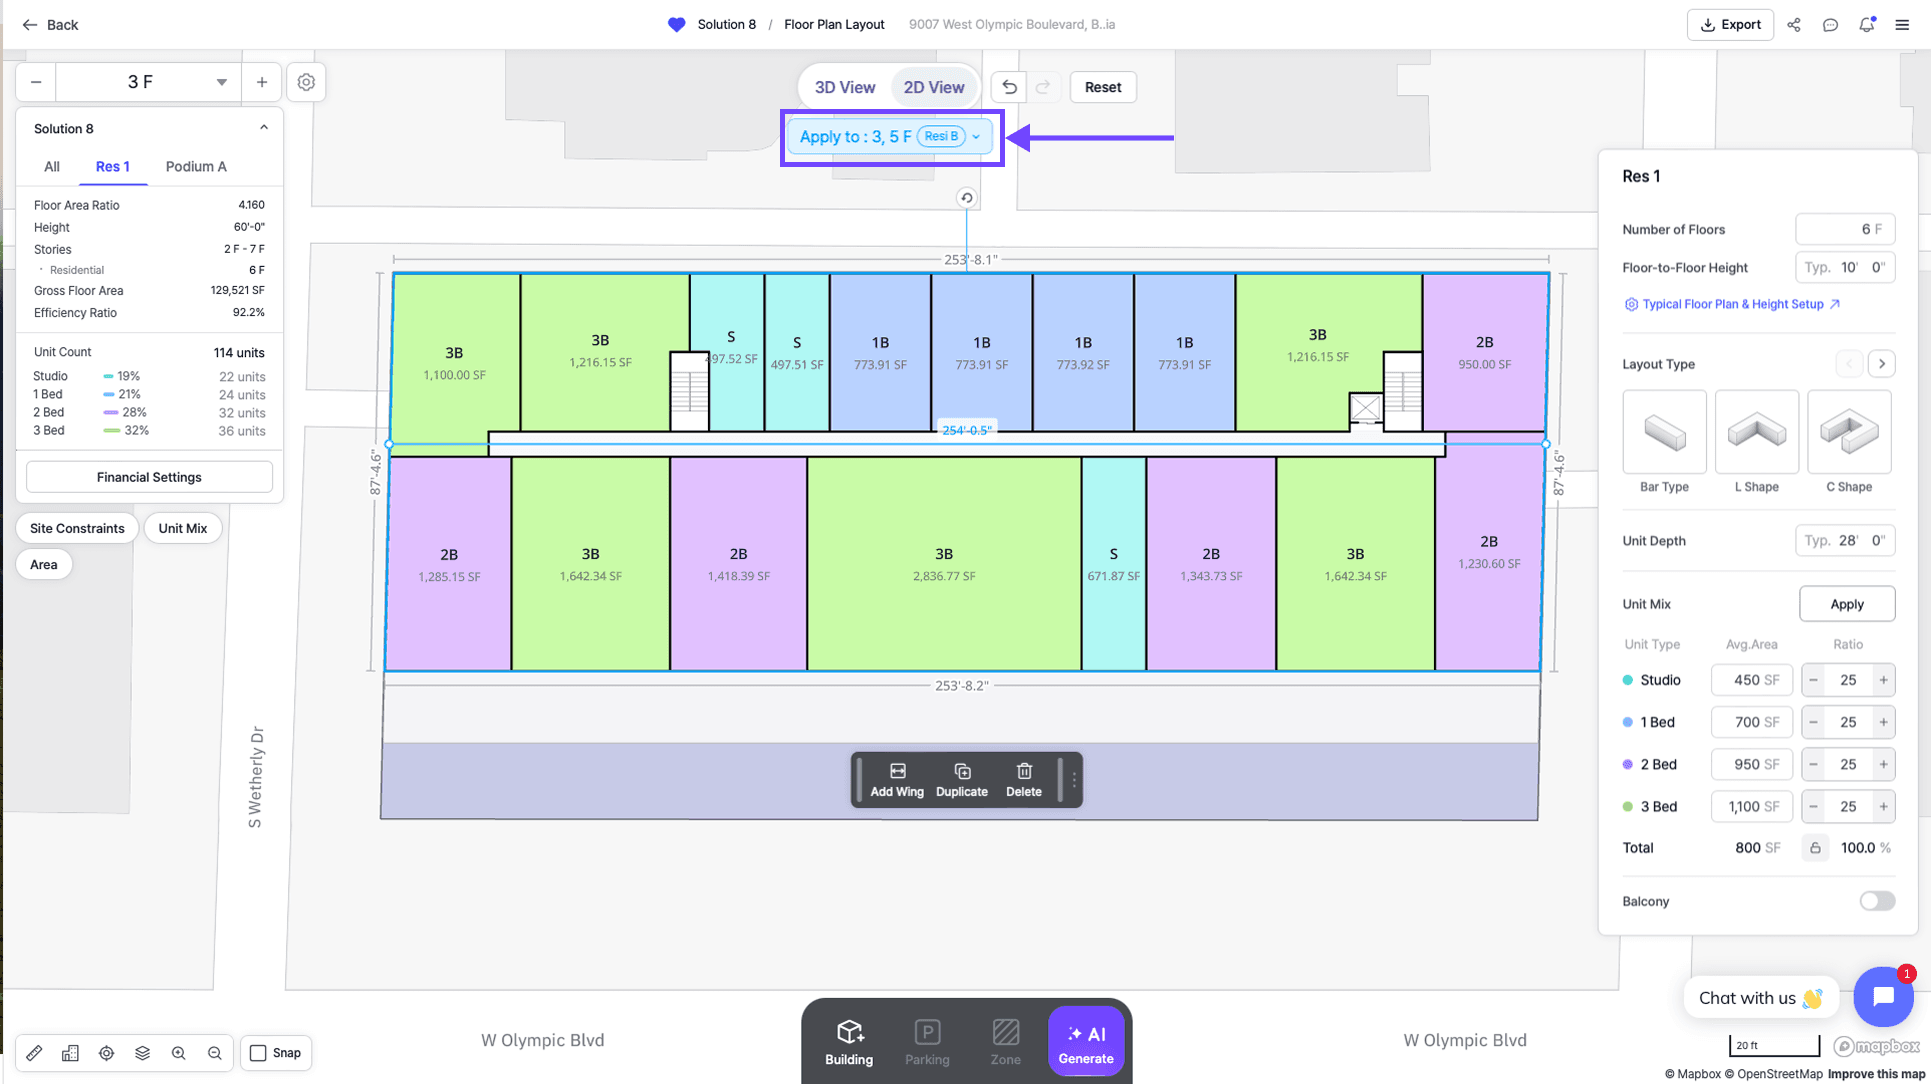
3. Any edits you make will apply to all floors sharing that plan type—saving time while ensuring design consistency.

Assign Typical Floor Plan to All Floors
Want to switch back to a single typical floor plan for the entire building? You can do it easily as such:
Apply to All Button
This button can be found under Typical Floor Plan & Height Setup and is always turned on by default from the start of the project.
If this was turned off by user during the editing process and user end up wanting to apply the same floor layout to the whole building, user can simply:
1. Turn on the Apply to All button,2. Choose the floor plan they would like to implement,3. Click Apply
The selected building layout will automatically implement the selected floor plan on all levels.

Other Resources
With Zenerate’s typical floor plan setup, you can easily assign, edit, and manage different floor layouts for each level of your project. Whether you're working on a tower with unique level constraints or optimizing repeated layouts, Zenerate streamlines the entire process—saving time and aligning designs with your project goals.
Looking to see this in action? Try it out with our free trial and explore how AI can simplify your architectural design workflow.